
Here's the short version: correct movement patterns prevent injury by spreading load across the right muscles and joints, so no single tissue gets hammered repeatedly until it gives up. If you want to act on that right now, here's your three-step starting point.
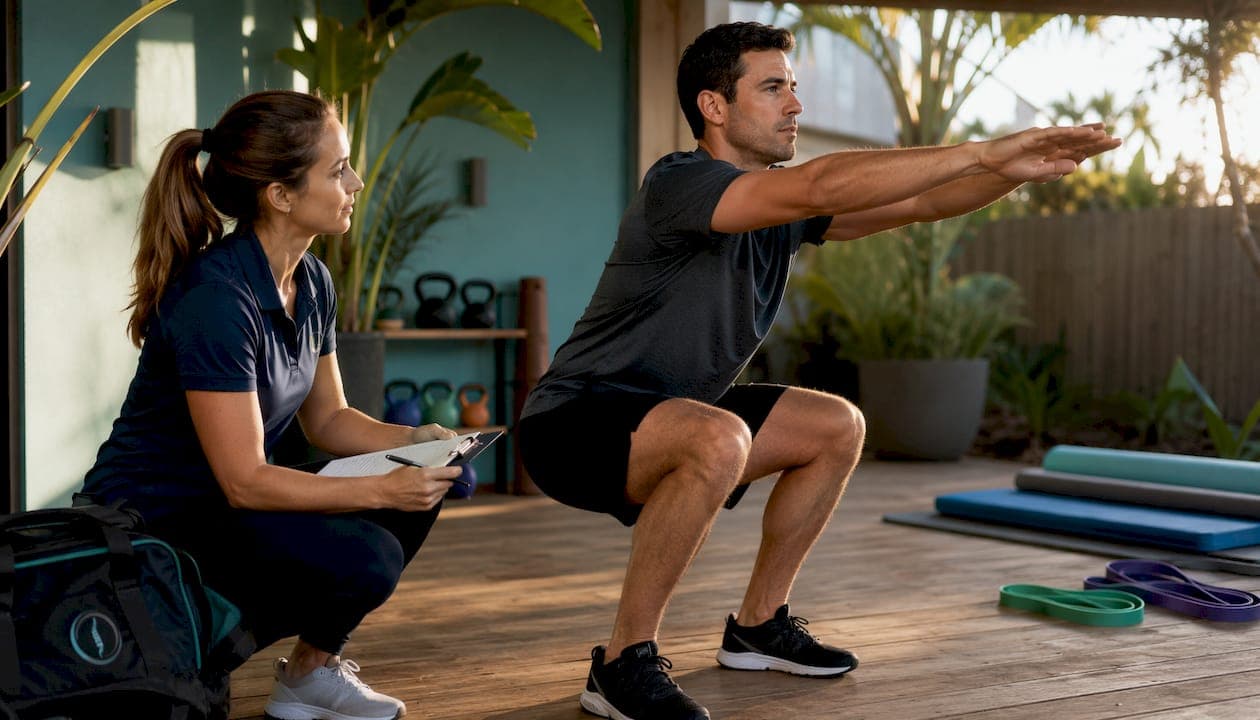
- Quick self-screen. Stand in front of a mirror and do a slow bodyweight squat. Watch for knees caving inward, heels lifting, or your torso collapsing forward. Any of those? That's your first fault to fix.
- Run a short mobility and activation routine. Five minutes of hip flexor stretching, glute activation (clamshells or bridges), and thoracic rotation before any session goes a long way.
- Know when to pause. If a movement causes sharp, pinching, or radiating pain, stop and get a professional assessment before continuing.
TL;DR — what you can expect when you sort your movement quality:
- Less nagging pain during and after training
- Safer sessions with lower injury risk over time
- Faster recovery because you're not constantly overloading the same tissues
- A clearer picture of which faults are actually driving your problems
Success looks like this: you identify your top one or two movement faults, follow a corrective plan for six to eight weeks, and return to your sport or training feeling more controlled and less beat-up. Simple as that.
Table of Contents
- How faulty movement patterns actually lead to injury
- The core movement patterns you need to master
- How to screen your movement quality right now
- The corrective hierarchy: mobility, activation, motor control, loading
- Sample corrective drills for each movement pattern
- When should you see a physio or sports therapist?
- How a hands-on assessment works in practice
- Key takeaways
- Movement correction: what the evidence actually tells us
- Sportsinjurydublin: hands-on help when self-correction isn't enough
- Further reading and primary sources
How faulty movement patterns actually lead to injury
Faulty patterns redistribute load onto tissues that aren't built to handle it, and eventually those tissues break down. That's the mechanism in one sentence, and the research backs it up pretty clearly.
When your body can't move through a pattern efficiently, it compensates. Your knee caves inward during a squat because your hip isn't doing its job. Your lower back rounds on a deadlift because your hamstrings are too tight to let your pelvis tilt properly. Each compensation shifts stress to a structure that wasn't designed to absorb it repeatedly, and compensatory patterns are predictable enough that clinicians can often tell you exactly which tissue will fail before it does.
"Movement problems commonly develop from long-term compensatory patterns where the body 'works around' deficits, leading to chronic overload of specific tissues." — clinical summary on compensatory strategies and tissue overload
The evidence on movement screening and injury risk is genuinely striking. Prospective studies show that low scores on movement quality assessments associate with a several-fold higher injury risk, with predictive accuracy around 70% for certain athletic groups. A separate study found that both movement quality and posture affect injury risk independently, meaning you can't fix one and ignore the other.
What makes this particularly relevant for active people is that micro-compensations don't only happen in the gym. Small habitual shifts in how you sit, walk, or carry things accumulate load just as training does. Address the pattern in daily life, not just during your sessions, and you're tackling the problem at its root.
The core movement patterns you need to master
Seven patterns underpin almost everything you do in sport and daily life: squat, hinge, lunge, push, pull, brace/anti-rotation, and gait. Mastering these with coordinated alignment is what enables safe, efficient activity across the board.
Here's what to watch for in each one:
- Squat: Knees tracking over toes, neutral spine, heels staying down. Fault to spot: knee valgus (knees diving inward), excessive forward lean, or heels lifting. Cue: "Push your knees out over your little toes."
- Hinge: Hip-dominant movement with a neutral spine. Fault: rounding through the lower back, or bending the knees so much it becomes a squat. Cue: "Hinge at the hips, not the waist — feel the stretch in your hamstrings."
- Lunge: Single-leg loading with stable pelvis. Fault: front knee collapsing inward, trunk rotating, or rear hip dropping. Cue: "Keep your front knee stacked over your ankle."
- Push: Shoulder blade control during pressing. Fault: shoulder shrugging, winging scapula, or excessive lumbar extension. Cue: "Pack your shoulder blades down and back before you press."
- Pull: Lat engagement and scapular retraction. Fault: using momentum, chin jutting forward, or losing lumbar position. Cue: "Drive your elbows toward your back pockets."
- Brace/anti-rotation: Resisting spinal movement under load. Fault: ribs flaring, pelvis tilting, or breath-holding. Cue: "360-degree breath into your belly, then brace like you're about to take a punch."
- Gait: Symmetrical stride, hip extension, arm swing. Fault: overstriding, reduced hip extension, or lateral trunk sway. Cue: "Push off through your big toe, not just your heel."
| Pattern | Common observable faults | Quick corrective cue |
|---|---|---|
| Squat | Knee valgus, heel rise, forward trunk lean | "Knees out, chest up, heels down" |
| Hinge | Lumbar rounding, knee-dominant pattern | "Hinge at hips, spine long" |
| Lunge | Knee collapse, pelvic drop, trunk rotation | "Stack knee over ankle, hips level" |
| Push | Scapular winging, shoulder shrug | "Blades down and back before pressing" |
| Pull | Momentum, chin jut, lumbar loss | "Elbows to back pockets" |
| Brace | Rib flare, breath-holding, pelvic tilt | "Belly breath, then brace" |
| Gait | Overstride, reduced hip extension, lateral sway | "Push off the big toe, drive the hip back" |
Pro Tip: For runners, the single-leg squat and gait pattern are the two most predictive of recurring problems. If your knee dives inward on a single-leg squat, that same fault is almost certainly showing up at mile three of your run, when fatigue kicks in and your glutes stop doing their job.
How to screen your movement quality right now
The goal of a quick self-screen is simple: identify one to three priority faults so you know exactly what to work on. You don't need a clinic to do this first pass (though a clinician will catch things you won't).
Bodyweight squat. Stand with feet shoulder-width apart, toes slightly out. Lower slowly to parallel or as deep as comfortable. Watch in a mirror or film yourself from the front and side. You're looking for knee valgus, heel rise, excessive forward lean, and whether the movement is symmetrical.

Single-leg squat or step-down. Stand on one leg and lower slowly onto a step or just bend the standing knee to about 45 degrees. This is where hip control faults become obvious. A knee that dives inward, a hip that drops, or a trunk that lurches sideways all signal hip abductor or glute weakness. This test is particularly useful for runners and anyone with knee pain.
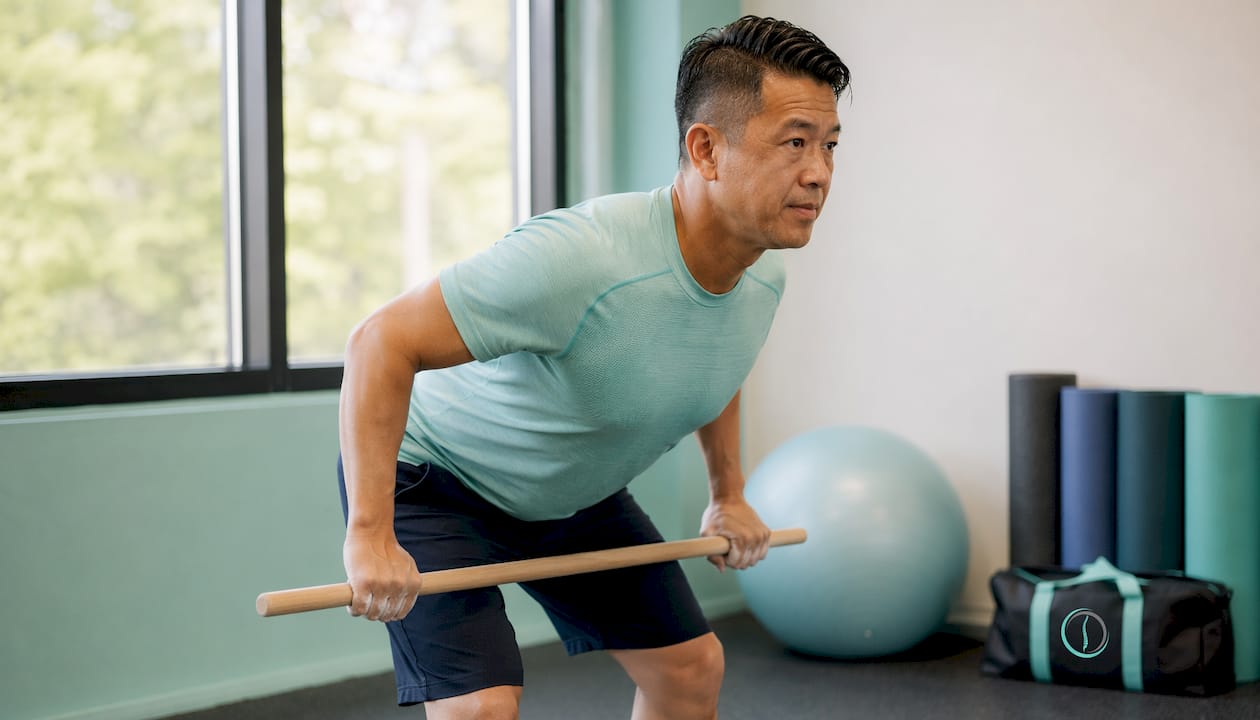
Hinge pattern. Stand with feet hip-width apart and hinge forward from the hips, keeping a neutral spine. Use a dowel rod or broom handle along your spine (touching head, mid-back, and tailbone) to feel whether you're maintaining position. Loss of contact at any point tells you where the fault is.
Overhead reach. Stand with feet together and reach both arms overhead. Watch for ribs flaring, lower back arching excessively, or one arm lagging behind the other. Asymmetry here often points to thoracic stiffness or shoulder mobility restrictions.
Gait observation. Walk normally for ten steps, then jog lightly if comfortable. Look for lateral trunk sway, reduced arm swing on one side, or asymmetrical foot strike. Even better, film from behind on a treadmill.
"Improving movement quality requires targeted assessment that distinguishes deficits in range of motion, strength and motor control; interventions should map to the limiting factor." — ACSM clinical guidance
Prioritising what to fix: pain comes first, always. If a pattern is painful, that's your number one priority and a signal to see a clinician. After pain, address asymmetry, because loading one side more than the other is a fast track to overuse injury. Then tackle load-bearing deficits, like an inability to control a single-leg squat.
Pro Tip: Film yourself from the front and side on your phone. What you feel and what you're actually doing are often very different things. A two-minute video review will show you faults that a mirror misses, especially in dynamic movements.
Safety caveat: if any screen movement causes sharp, pinching, or radiating pain, stop immediately. That's a red flag, not a starting point for self-correction. Book a professional assessment before continuing.
The corrective hierarchy: mobility, activation, motor control, loading
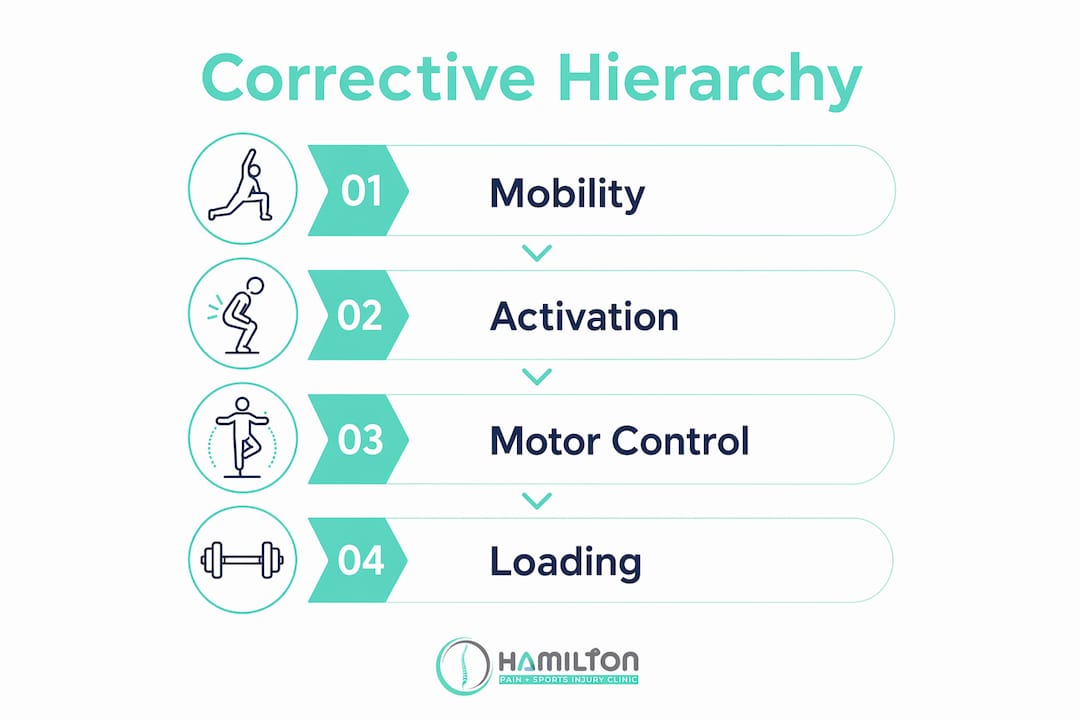
The order is non-negotiable: mobility first, then activation, then motor control, then progressive loading. Skipping steps doesn't save time; it just means you're loading a pattern that isn't ready for it.
Here's why the sequence matters. If a joint doesn't have the range of motion a movement requires, no amount of coaching cues will fix the pattern. You literally can't squat to depth with stiff ankles, regardless of how hard you concentrate. Mobility must come first because cognitive correction alone is ineffective when the structural access isn't there. Once range is available, activation work wakes up the muscles that should be driving the movement. Then motor control drills teach the nervous system to sequence those muscles correctly under light load. Only then does it make sense to add meaningful resistance.
| Phase | Objective | Typical exercises | Short-term goal |
|---|---|---|---|
| Mobility | Restore joint range of motion | Hip flexor stretch, ankle dorsiflexion, thoracic rotation | Pain-free full range on screen movement |
| Activation | Recruit underactive muscles | Glute bridges, clamshells, band pull-aparts, dead bugs | 3 sets of 10 with clean form and no compensation |
| Motor control | Groove correct movement pattern | Goblet squat, Romanian deadlift, split squat, pallof press | 5–10 controlled reps with symmetry within 10–15% |
| Progressive loading | Build capacity under load | Barbell squat, trap bar deadlift, Bulgarian split squat | Return to sport or training load without pain |
A realistic six to eight week outline looks like this. Weeks one and two focus almost entirely on mobility and activation, two to three sessions per week, ten to fifteen minutes per session. Weeks three and four introduce motor control drills at bodyweight or very light load. Weeks five to eight progressively add resistance, with the trigger to advance being clean form on the previous phase's benchmark, not the calendar.
Red flags that mean you should not push a pattern: sharp or radiating pain during any drill, swelling that increases after sessions, progressive loss of range rather than gain, or neurological symptoms like tingling or numbness.
Pro Tip: Mobility gains without strength to back them up leave a joint more exposed, not less. If you've just stretched your hip flexors into a new range, pair it immediately with a glute activation drill to give the joint something to hold onto in that position. Flexibility without capacity is a liability.
Sample corrective drills for each movement pattern
Every drill you choose needs to match both the assessed fault and the corrective phase you're in. A mobility drill for someone who already has full range is wasted time. A loaded squat for someone who can't yet control a bodyweight version is asking for trouble.
Squat pattern
- Regress: box squat to a high surface — sit back to a chair or box, pause, stand. Tempo: 3 seconds down, 1 pause, 2 up. 3 sets of 8. Cue: "Sit back, not down."
- Base: goblet squat — hold a light dumbbell at chest height, squat to depth. 3 sets of 10. Cue: "Elbows inside knees, chest tall."
- Progress: barbell back squat — add load incrementally. 3 sets of 5. Cue: "Brace before you descend."
Common mistake: rushing to the barbell before the goblet squat is clean. Don't.
Hinge pattern
- Regress: hip hinge with dowel — use a broom handle along your spine to feel neutral. 3 sets of 10. Cue: "Push hips back to the wall behind you."
- Base: Romanian deadlift (light dumbbell) — slow eccentric, feel hamstring stretch. 3 sets of 10. Cue: "Spine long, hips drive the movement."
- Progress: trap bar deadlift — load progressively. 3 sets of 5. Cue: "Push the floor away."
Lunge pattern
- Regress: split squat (static) — back foot on floor, lower slowly. 3 sets of 8 each side. Cue: "Front knee tracks over ankle."
- Base: reverse lunge — step back, lower, return. 3 sets of 10 each side. Cue: "Hips level throughout."
- Progress: Bulgarian split squat — rear foot elevated. 3 sets of 8. Cue: "Drive through the front heel."
Push pattern
- Regress: wall push-up — focus on scapular control. 3 sets of 12. Cue: "Don't let your shoulder blades wing."
- Base: floor press or push-up — full range, controlled. 3 sets of 10. Cue: "Blades packed, ribs down."
- Progress: dumbbell bench press — add load. 3 sets of 8. Cue: "Shoulder blades into the bench."
Pull pattern
- Regress: band pull-apart — arms straight, pull band apart at chest height. 3 sets of 15. Cue: "Squeeze between your shoulder blades."
- Base: seated cable row or dumbbell row — controlled tempo. 3 sets of 10. Cue: "Elbow to back pocket."
- Progress: pull-up or lat pulldown — full range. 3 sets of 6–8. Cue: "Initiate with lats, not arms."
Brace and gait
- Dead bug: lie on back, extend opposite arm and leg slowly. 3 sets of 8 each side. Cue: "Lower back stays flat on the floor."
- Pallof press: band or cable at chest height, press out and hold. 3 sets of 10 each side. Cue: "Don't let the band rotate you."
- Single-leg stance: stand on one leg for 30 seconds, progress to eyes closed. Cue: "Soft knee, hip level."
- Reactive neuromuscular training drills like perturbation training and single-leg balance progressions are particularly useful for gait retraining; reactive neuromuscular training builds the automatic motor responses that protect joints during dynamic activity.
Integrating drills into your existing training: add ten to fifteen minutes at the start of a session as part of your warm-up, or at the end as a cooldown focus. Don't try to cram all patterns into one session. Pick the one or two faults your screen identified and work those consistently. Three sessions per week is plenty for meaningful change.
When should you see a physio or sports therapist?
See a clinician if you have pain during movement, no meaningful improvement after four to six weeks of consistent corrective work, persistent asymmetry, or symptoms that are getting worse rather than better. That's the threshold. Everything else you can reasonably manage with a structured self-directed plan.
Typical timelines give you a useful benchmark. Mobility gains tend to show up within one to three weeks of consistent work, which is genuinely encouraging. Motor control improvements take longer, usually four to eight weeks, because you're essentially teaching your nervous system a new skill. Meaningful load tolerance, the point where you can train at normal intensity without compensation, typically takes six to twelve weeks. These aren't guarantees, but they're realistic checkpoints.
"Not all injuries are preventable, but modifying technique, building fitness progressively and using proper equipment reduce risk and support safer return to activity." — Cleveland Clinic clinical guidance
Red flags that need immediate professional attention:
- Sharp, stabbing, or radiating pain (especially into the arm or leg)
- Progressive swelling in a joint after activity
- Loss of strength or sensation (tingling, numbness)
- A movement that was improving but suddenly gets worse
- Any snap, pop, or giving-way sensation
If you're ticking any of those boxes, stop self-managing and book an assessment. For older athletes especially, injury risk management warrants earlier professional input, because tissue tolerance and recovery timelines differ.
Realistic checkpoint timeline:
Week 1–3: mobility improving, less stiffness after sessions. Week 4–6: movement pattern feels more controlled, compensation reducing. Week 6–8: able to load the pattern without pain. Week 8–12: return to full training load. If you're not hitting these checkpoints, escalate to a clinician.
How a hands-on assessment works in practice
A good corrective case starts with a clear presenting complaint, a thorough movement screen, and a plan that addresses root causes rather than just symptoms. Here's what that looks like in practice.
Take a recreational runner presenting with recurring knee pain. The initial assessment at Sportsinjurydublin identifies reduced hip external rotation, weak glute medius on the affected side, and a knee-valgus fault on single-leg squat. The pain isn't coming from the knee; the knee is just where the compensation lands.
The corrective plan follows the hierarchy: two weeks of hip mobility work and glute activation, then motor control drills focusing on single-leg squat control and hip-dominant running mechanics, then a progressive return-to-run programme with load managed carefully. The measurable outcome used is symmetry on single-leg squat (within 10–15% side-to-side) and pain-free completion of a return-to-sport protocol.
"Compensatory patterns are predictable and typically cause chronic tissue overload; proactive, individualised assessments reduce recurrence by addressing root causes rather than symptoms." — clinical insight on compensatory movement patterns
At a first appointment with Sportsinjurydublin, you can expect a full movement screen (including video analysis where relevant), hands-on assessment of joint mobility and muscle function, and a discussion of your training history and goals. Treatment options available include manual therapy, dry needling, deep tissue massage, and tailored exercise programming. Home-based drills are integrated from session one, so you're not dependent on clinic visits to make progress.
A Functional Movement Screening assessment, which evaluates seven fundamental movement patterns scored on a 21-point scale, is one of the tools used to identify deficits and guide corrective exercise choices. Research shows that functional correction training after FMS screening reduced sports injury risk by 60% in experimental groups compared to controls, which is a pretty compelling reason to take movement quality seriously.
Individual results vary, and the timeline depends on the severity of the fault, training history, and how consistently the corrective plan is followed. What doesn't vary is the approach: assess properly, address the root cause, progress systematically.
Key takeaways
Correct movement patterns prevent injury by distributing load efficiently across joints and muscles, reducing the chronic compensations that cause most overuse injuries in active people.
| Point | Details |
|---|---|
| Screen first | Identify your top one to three movement faults before starting any corrective work. |
| Follow the hierarchy | Work through mobility, activation, motor control, and loading in that order — skipping phases increases risk. |
| Expect realistic timelines | Mobility improves in one to three weeks; motor control takes four to eight weeks; full load tolerance needs six to twelve weeks. |
| Know your red flags | Sharp or radiating pain, swelling, neurological symptoms, or no improvement after four to six weeks means see a clinician. |
| Sportsinjurydublin | Offers hands-on assessment, individualised corrective plans, and supervised progressions for active people needing structured support. |
Movement correction: what the evidence actually tells us
Here's my honest take: most active people are one decent movement screen away from understanding exactly why they keep getting hurt. The research on this is clear enough. Low movement quality scores associate with meaningfully higher injury risk, and injury prevention through corrective training has real, measurable effects. The frustrating part is that most people skip the screen entirely and go straight to loading a pattern that was already broken.
What clinicians actually do, and what the evidence supports, is treat movement re-education as a neurological skill, not just a physical one. You're not just stretching a tight muscle; you're retraining a motor pattern that's been wired in for years. That takes repetition, patience, and the right progression. Rushing it because you feel fine is exactly how people end up back at square one.
For a recreational runner, the priority is almost always hip control and single-leg stability. For a gym regular, it's usually the hinge pattern and bracing. For a weekend warrior doing a bit of everything, it tends to be asymmetry, one side compensating for the other in ways that only show up under fatigue. The corrective approach is the same for all three; the starting point just differs.
The biggest mistake I see? People treating corrective work as something separate from their training, a chore to get through before the "real" session. The most effective approach is to weave it in from the start, make it part of how you warm up, and treat movement quality as a performance goal in its own right. Because it is.
Sportsinjurydublin: hands-on help when self-correction isn't enough
If your screen has flagged a fault that isn't shifting, or you're dealing with pain that keeps coming back despite your best efforts, a hands-on assessment changes everything. Sportsinjurydublin offers individualised movement assessments, corrective exercise programming, and supervised progressions tailored to your specific faults and goals — not a generic protocol handed to everyone who walks through the door.

The clinic's recovery sessions pair hands-on treatment with guided corrective work, so you're not just managing symptoms but actually fixing the underlying pattern. For those working back from injury, the return-to-sport rehabilitation programme provides structured, staged progressions with objective milestones at every phase. Where tissue pathology needs additional support, shockwave and laser therapy is available alongside corrective programming. Book an assessment and leave with a clear plan, not just a diagnosis.
Further reading and primary sources
- Prediction and injury risk based on movement patterns and flexibility — PMC: Prospective study linking low movement quality scores to several-fold higher injury risk; the primary evidence base for screening thresholds used in this article.
- Effects of functional correction training on injury risk — PMC: Systematic review and meta-analysis showing a 60% reduction in sports injury risk following FMS-based corrective training.
- Exercising to improve movement quality: why and how — ACSM: ACSM guidance on assessment-driven exercise prescription targeting range of motion, motor control, and strength; underpins the corrective hierarchy section.
- The impact of body posture and movement pattern quality on injuries — MDPI: Study demonstrating that posture and movement quality affect injury risk independently; supports the case for addressing both in corrective programmes.
- Sports injury prevention strategies — Mayo Clinic: Practical clinical guidance on technique modification, progressive overload, and the importance of pairing mobility with strength.
- Core stability training for injury prevention — PMC: Evidence review on core stability as a component of musculoskeletal injury prevention programmes.
- Sportsinjurydublin: Clinic contact and service information for hands-on assessment, corrective programming, and return-to-sport rehabilitation in Dublin.